Tutorial - Basic
Overview
Throughout this tutorial, we will create an application with a simple registration form, while introducing the main design aspects of Phalcon.
This tutorial covers the implementation of a simple MVC application, showing how fast and easy it can be done with Phalcon. Once developed, you can use this application and extend it to suit your needs. The code in this tutorial can also be used as a playground to learn other Phalcon-specific concepts and ideas.
If you just want to get started you can skip this and create a Phalcon project automatically with our developer tools.
The best way to use this guide is to follow along and try to have fun. You can get the complete code here. If you get stuck or have questions, please visit us on Discord or in our Discussions.
File Structure
One of the key features of Phalcon is that it is loosely coupled. Because of that, you can use any directory structure that is convenient for you. In this tutorial, we will use a standard directory structure, commonly used in MVC applications.
.
└── tutorial
    ├── src
    │   ├── controllers
    │   │   ├── IndexController.php
    │   │   └── SignupController.php
    │   ├── models
    │   │   └── Users.php
    │   └── views
    └── public
        ├── css
        ├── img
        ├── index.php
        └── js
NOTE
Since all the code that Phalcon exposes is encapsulated in the extension (that you have loaded on your web server), you will not see vendor directory containing the Phalcon code. Everything you need is in memory. If you have not installed the application yet, head over to the installation page and complete the installation prior to continuing with this tutorial.
If this is all brand new it is recommended that you install the Phalcon Devtools also. The DevTools leverage PHP's built-in web server, allowing you to run your application almost immediately. If you choose this option, you will need a .htrouter.php file at the root of your project with the following contents:
<?php

$uri = urldecode(
    parse_url($_SERVER['REQUEST_URI'], PHP_URL_PATH)
);

if ($uri !== '/' && file_exists(__DIR__ . '/public' . $uri)) {
    return false;
}

$_GET['_url'] = $_SERVER['REQUEST_URI'];

require_once __DIR__ . '/public/index.php';
In the case of our tutorial, this file must be located in the tutorial directory.
You can also use nginX, apache, cherokee, or other web servers. You can check the webserver setup page for instructions.
Bootstrap
The first file you need to create is the bootstrap file. This file acts as the entry point and configuration for your application. In this file, you can implement the initialization of components as well as define application behavior.
This file handles 3 things: - Registration of component autoloaders - Configuring Services and registering them with the Dependency Injection context - Resolving the application's HTTP requests
Autoloader
We are going to use Phalcon\Autoload\Loader a PSR-4 compliant file loader. Common things that should be added to the autoloader are your controllers and models. You can also register directories which will be scanned for files required by the application.
To start, let's register our app's controllers and models directories using Phalcon\Autoload\Loader:
public/index.php
<?php

use Phalcon\Autoload\Loader;

define('BASE_PATH', dirname(__DIR__ . '/..'));
define('APP_PATH', BASE_PATH . '/app');
// ...

$loader = new Loader();
$loader->setDirectories(
    [
        APP_PATH . '/controllers/',
        APP_PATH . '/models/',
    ]
);


$loader->register();
Dependency Management
Since Phalcon is loosely coupled, services are registered with the framework's Dependency Manager, so they can be injected automatically into components and services wrapped in the IoC container. Frequently you will encounter the term DI which stands for Dependency Injection. Dependency Injection and Inversion of Control(IoC) may sound complex but Phalcon ensures that their use is simple, practical, and efficient. Phalcon's IoC container consists of the following concepts: - Service Container: a "bag" where we globally store the services that our application needs to function. - Service or Component: Data processing object that will be injected into components
Each time the framework requires a component or service, it will ask the container to use an agreed-upon name for the service. This way we have an easy way to retrieve objects necessary for our application, such as the logger, database connection, etc.
NOTE
If you are still interested in the details please see this article by Martin Fowler. Also, we have a great tutorial covering many use cases.
Factory Default
The Phalcon\Di\FactoryDefault is a variant of Phalcon\Di\Di. To make things easier, it will automatically register most of the components that are required by an application and come with Phalcon as standard. Although it is recommended to set up services manually, you can use the Phalcon\Di\FactoryDefault container initially and later on customize it to fit your needs.
Services can be registered in several ways, but for our tutorial, we will use an anonymous function:
public/index.php
Now we need to register the view service, setting the directory where the framework will find the view files. As the views do not correspond to classes, they cannot be automatically loaded by our autoloader.
public/index.php
<?php

use Phalcon\Mvc\View;

// ...

$container->set(
    'view',
    function () {
        $view = new View();
        $view->setViewsDir(APP_PATH . '/views/');

        return $view;
    }
);
Now we need to register a base URI, that will offer the functionality to create all URIs by Phalcon. The component will ensure that whether you run your application through the top directory or a subdirectory, all your URIs will be correct. For this tutorial, our base path is /. This will become important later on in this tutorial when we use the class Phalcon\Tag to generate hyperlinks.
public/index.php
<?php

use Phalcon\Mvc\Url;

// ...

$container->set(
    'url',
    function () {
        $url = new Url();
        $url->setBaseUri('/');

        return $url;
    }
);
Handling the Application Request
In order to handle any requests, the Phalcon\Mvc\Application object is used to do all the heavy lifting for us. The component will accept the request by the user, detect the routes dispatch the controller, and render the view returning the results.
public/index.php
<?php

use Phalcon\Mvc\Application;

// ...

$application = new Application($container);

$response = $application->handle(
    $_SERVER["REQUEST_URI"]
);

$response->send();
Putting Everything Together
The tutorial/public/index.php file should look like:
public/index.php
<?php

use Phalcon\Di\FactoryDefault;
use Phalcon\Autoload\Loader;
use Phalcon\Mvc\View;
use Phalcon\Mvc\Application;
use Phalcon\Url;

define('BASE_PATH', dirname(__DIR__));
define('APP_PATH', BASE_PATH . '/app');

$loader = new Loader();

$loader->setDirectories(
    [
        APP_PATH . '/controllers/',
        APP_PATH . '/models/',
    ]
);

$loader->register();

$container = new FactoryDefault();

$container->set(
    'view',
    function () {
        $view = new View();
        $view->setViewsDir(APP_PATH . '/views/');
        return $view;
    }
);

$container->set(
    'url',
    function () {
        $url = new Url();
        $url->setBaseUri('/');
        return $url;
    }
);

$application = new Application($container);

try {
    // Handle the request
    $response = $application->handle(
        $_SERVER["REQUEST_URI"]
    );

    $response->send();
} catch (\Exception $e) {
    echo 'Exception: ', $e->getMessage();
}
NOTE
In the tutorial files from our GitHub repository, to register services in the DI container, we use the array notation i.e. $container['url'] = .....
As you can see, the bootstrap file is very short, and we do not need to include any additional files. You are well on your way to creating a flexible MVC application in less than 30 lines of code.
Creating a Controller
By default, Phalcon will look for a controller named IndexController. It is the starting point when no controller or action has been added to the request (e.g. https://localhost/). An IndexController and its IndexAction should resemble the following example:
app/controllers/IndexController.php
<?php
use Phalcon\Mvc\Controller;
class IndexController extends Controller
{
public function indexAction()
{
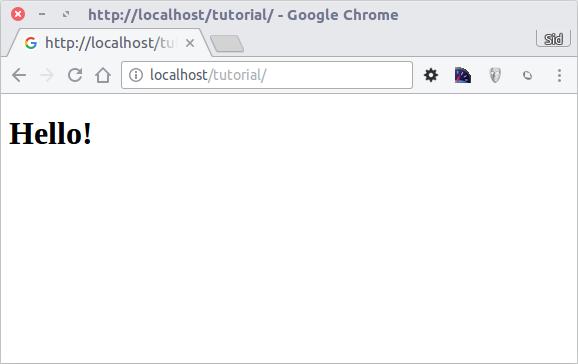
return '<h1>Hello!</h1>';
}
}
The controller classes must have the suffix Controller and controller actions must have the suffix Action. For more information, you can read our document about controllers. If you access the application from your browser, you should see something like this:
NOTE
Congratulations, you are Phlying with Phalcon!
Sending Output to a View
Sending output to the screen from the controller is at times necessary but not desirable as most purists in the MVC community will attest. Everything must be passed to the view that is responsible for outputting data on the screen. Phalcon will look for a view with the same name as the last executed action inside a directory named the last executed controller.
Therefore, in our case if the URL is:
will invoke the IndexController and indexAction, and it will search the view:
If found it will parse it and send the output on screen. Our view then will have the following contents:
app/views/index/index.phtml
and since we moved the echo from our controller action to the view, it will be empty now:
app/controllers/IndexController.php
<?php

use Phalcon\Mvc\Controller;

class IndexController extends Controller
{
    public function indexAction()
    {

    }
}
The browser output will remain the same. The Phalcon\Mvc\View component is automatically created when the action execution has ended. You can read more about views in Phalcon here.
Designing a Sign-up Form
Now we will change the index.phtml view file, to add a link to a new controller named signup. The goal is to allow users to sign up to our application.
app/views/index/index.phtml
<?php
echo "<h1>Hello!</h1>";
echo PHP_EOL;
echo PHP_EOL;
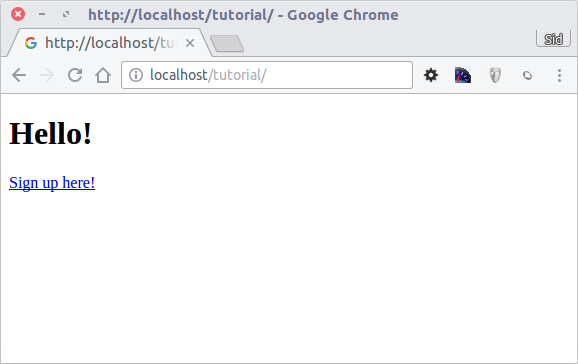
echo $this->tag->a('signup', 'Sign Up Here!');
The generated HTML code displays an anchor (<a>) HTML tag linking to a new controller:
app/views/index/index.phtml (rendered)
To generate the link for the <a> tag, we use the Phalcon\Html\TagFactory component. This is a utility class that offers an easy way to build HTML tags with framework conventions in mind. This class is also a service registered in the Dependency Injector, so we can use $this->tag to access its functionality.
NOTE
Phalcon\Html\TagFactory is already registered in the DI container since we have used the Phalcon\Di\FactoryDefault container. If you registered all the services on your own, you will need to register this component in your container to make it available in your application.
And the Signup controller is (app/controllers/SignupController.php):
app/controllers/SignupController.php
<?php

use Phalcon\Mvc\Controller;

class SignupController extends Controller
{
    public function indexAction()
    {

    }
}
The empty index action gives the clean pass to a view with the form definition (app/views/signup/index.phtml):
app/views/signup/index.phtml
<h2>Sign up using this form</h2>

<?php echo $this->tag->form("signup/register"); ?>

    <p>
        <label for="name">Name</label>
        <?php echo $this->tag->textField("name"); ?>
    </p>

    <p>
        <label for="email">E-Mail</label>
        <?php echo $this->tag->textField("email"); ?>
    </p>

    <p>
        <?php echo $this->tag->submitButton("Register"); ?>
    </p>

</form>
Viewing the form in your browser will display the following:
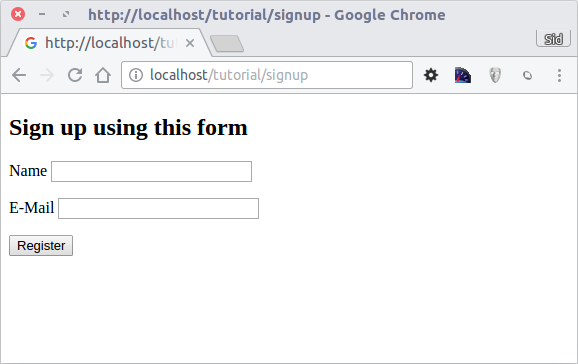
As mentioned above, the Phalcon\Html\TagFactory utility class, exposes useful methods allowing you to build form HTML elements with ease. The form() method receives an array of key/value pairs that set up the form, for example, a relative URI to a controller/action in the application. The inputText() creates a text HTML element with the name as the passed parameter, while the inputSubmit() creates a submit HTML button. Finally, a call to close() will close our <form> tag.
By clicking the Register button, you will notice an exception thrown from the framework, indicating that we are missing the register action in the controller signup. Our public/index.php file throws this exception:
Implementing that method will remove the exception:
app/controllers/SignupController.php
<?php

use Phalcon\Mvc\Controller;

class SignupController extends Controller
{
    public function indexAction()
    {

    }

    public function registerAction()
    {

    }
}
If you click the Register button again, you will see a blank page. We will be adding a view a little later that provides useful feedback. But first, we should work on the code to store the user's inputs in a database.
According to MVC guidelines, database interactions must be done through models to ensure clean, object-oriented code.
Creating a Model
Phalcon brings the first ORM for PHP entirely written in C-language. Instead of increasing the complexity of development, it simplifies it.
Before creating our first model, we need to create a database table using a database access tool or the database command line utility. For this tutorial we are using MySQL as our database, A simple table to store registered users can be created as follows:
create_users_table.sql
CREATE TABLE `users`
(
    `id`    int unsigned NOT NULL AUTO_INCREMENT COMMENT 'Record ID',
    `name`  varchar(255) NOT NULL COMMENT 'User Name',
    `email` varchar(255) NOT NULL COMMENT 'User Email Address',
    PRIMARY KEY (`id`)
) ENGINE=InnoDB DEFAULT CHARSET=utf8mb4;
A model should be located in the app/models directory (app/models/Users.php). The model maps to the users table:
app/models/Users.php
NOTE
Note that the public properties of the model correspond to the names of the fields in our table.
Setting a Database Connection
In order to use a database connection and subsequently access data through our models, we need to specify it in our bootstrap process. A database connection is just another service that our application has, that can be used throughout our application:
public/index.php
<?php

use Phalcon\Db\Adapter\Pdo\Mysql;

$container->set(
    'db',
    function () {
        return new Mysql(
            [
                'host'     => '127.0.0.1',
                'username' => 'root',
                'password' => 'secret',
                'dbname'   => 'tutorial',
            ]
        );
    }
);
Adjust the code snippet above as appropriate for your database.
With the correct database parameters, our model is ready to interact with the rest of the application, so we can save the user's input. First, let's take a moment and create a view for SignupController::registerAction() that will display a message letting the user know the outcome of the save operation.
app/views/signup/register.phtml
<div class="alert alert-<?php echo $success === true ? 'success' : 'danger'; ?>">
    <?php echo $message; ?>
</div>

<?php echo $this->tag->a('/', 'Go back', ['class' => 'btn btn-primary']); ?>
Storing Data using Models
app/controllers/SignupController.php
<?php
use Phalcon\Mvc\Controller;
class SignupController extends Controller
{
public function indexAction()
{
}
public function registerAction()
{
$post = $this->request->getPost();
// Store and check for errors
$user = new Users();
$user->name = $post['name'];
$user->email = $post['email'];
// Store and check for errors
$success = $user->save();
// passing the result to the view
$this->view->success = $success;
if ($success) {
$message = "Thanks for registering!";
} else {
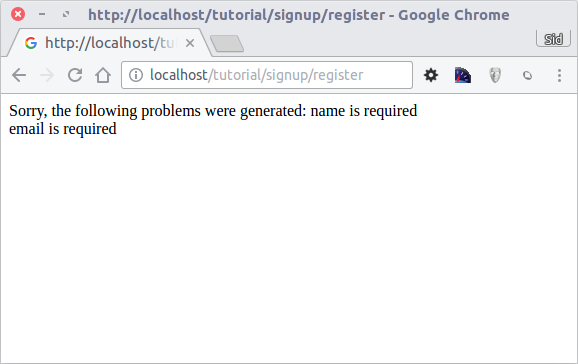
$message = "Sorry, the following problems were generated:<br>"
. implode('<br>', $user->getMessages());
}
// passing a message to the view
$this->view->message = $message;
}
}
At the beginning of the registerAction we create an empty user object using the Users class we created earlier. We will use this class to manage the record of a user. As mentioned above, the class's public properties map to the fields of the users table in our database. Setting the relevant values in the new record and calling save() will store the data in the database for that record. The save() method returns a boolean value which indicates whether the save was successful or not.
The ORM will automatically escape the input preventing SQL injections, so we only need to pass the request to the save() method.
Additional validation happens automatically on fields that are defined as not null (required). If we do not enter any of the required fields in the sign-up form our screen will look like this:
List the Registered Users
Now we will need to get and display all the registered users in our database
The first thing that we are going to do in our indexAction of theIndexController is to show the result of the search of all the users, which is done simply by calling the static method find() on our model (Users::find()).
indexAction would change as follows:
app/controllers/IndexController.php
<?php

use Phalcon\Mvc\Controller;

class IndexController extends Controller
{
    /**
     * Welcome and user list
     */
    public function indexAction()
    {
        $this->view->users = Users::find();
    }
}
NOTE
We assign the results of the find to a magic property on the view object. This sets this variable with the assigned data and makes it available in our view
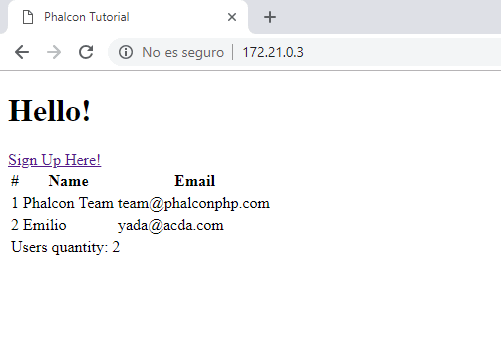
In our view file views/index/index.phtml we can use the $users variable as follows:
The view will look like this:
views/index/index.phtml
<?php

echo "<h1>Hello!</h1>";

echo $this->tag->a('signup', 'Sign Up Here!', ['class' => 'btn btn-primary']);

if ($users->count() > 0) {
    ?>
    <table class="table table-bordered table-hover">
        <thead class="thead-light">
        <tr>
            <th>#</th>
            <th>Name</th>
            <th>Email</th>
        </tr>
        </thead>
        <tfoot>
        <tr>
            <td colspan="3">Users quantity: <?php echo $users->count(); ?></td>
        </tr>
        </tfoot>
        <tbody>
        <?php foreach ($users as $user) { ?>
            <tr>
                <td><?php echo $user->id; ?></td>
                <td><?php echo $user->name; ?></td>
                <td><?php echo $user->email; ?></td>
            </tr>
        <?php } ?>
        </tbody>
    </table>
    <?php
}
As you can see our variable $users can be iterated and counted. You can get more information on how models operate in our document about models.
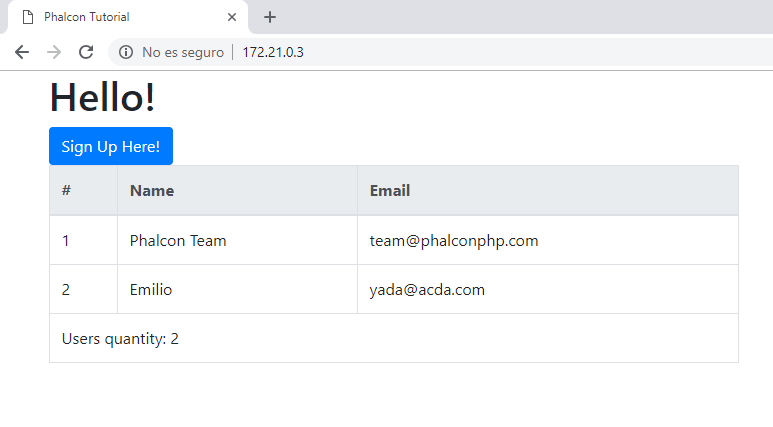
Styling
We can now add small design touches to our application. We can add the Bootstrap CSS in our code so that it is used throughout our views. We will add an index.phtml file in theviews folder, with the following content:
app/views/index.phtml
<!doctype html>
<html lang="en">
<head>
    <meta charset="UTF-8">
    <title>Phalcon Tutorial</title>
    <link rel="stylesheet"
          href="https://cdn.jsdelivr.net/npm/[email protected]/dist/css/bootstrap.min.css">
</head>
<body>
<div class="container">
    <?php echo $this->getContent(); ?>
</div>
</body>
</html>
In the above template, the most important line is the call to the getContent() method. This method returns all the content that has been generated from our view. Our application will now show:
Conclusion
As you can see, it is easy to start building an application using Phalcon. Because Phalcon is an extension loaded in memory, the footprint of your project will be minimal, while at the same time, you will enjoy a nice performance boost.
If you are ready to learn more check out the Vökuró Tutorial next.